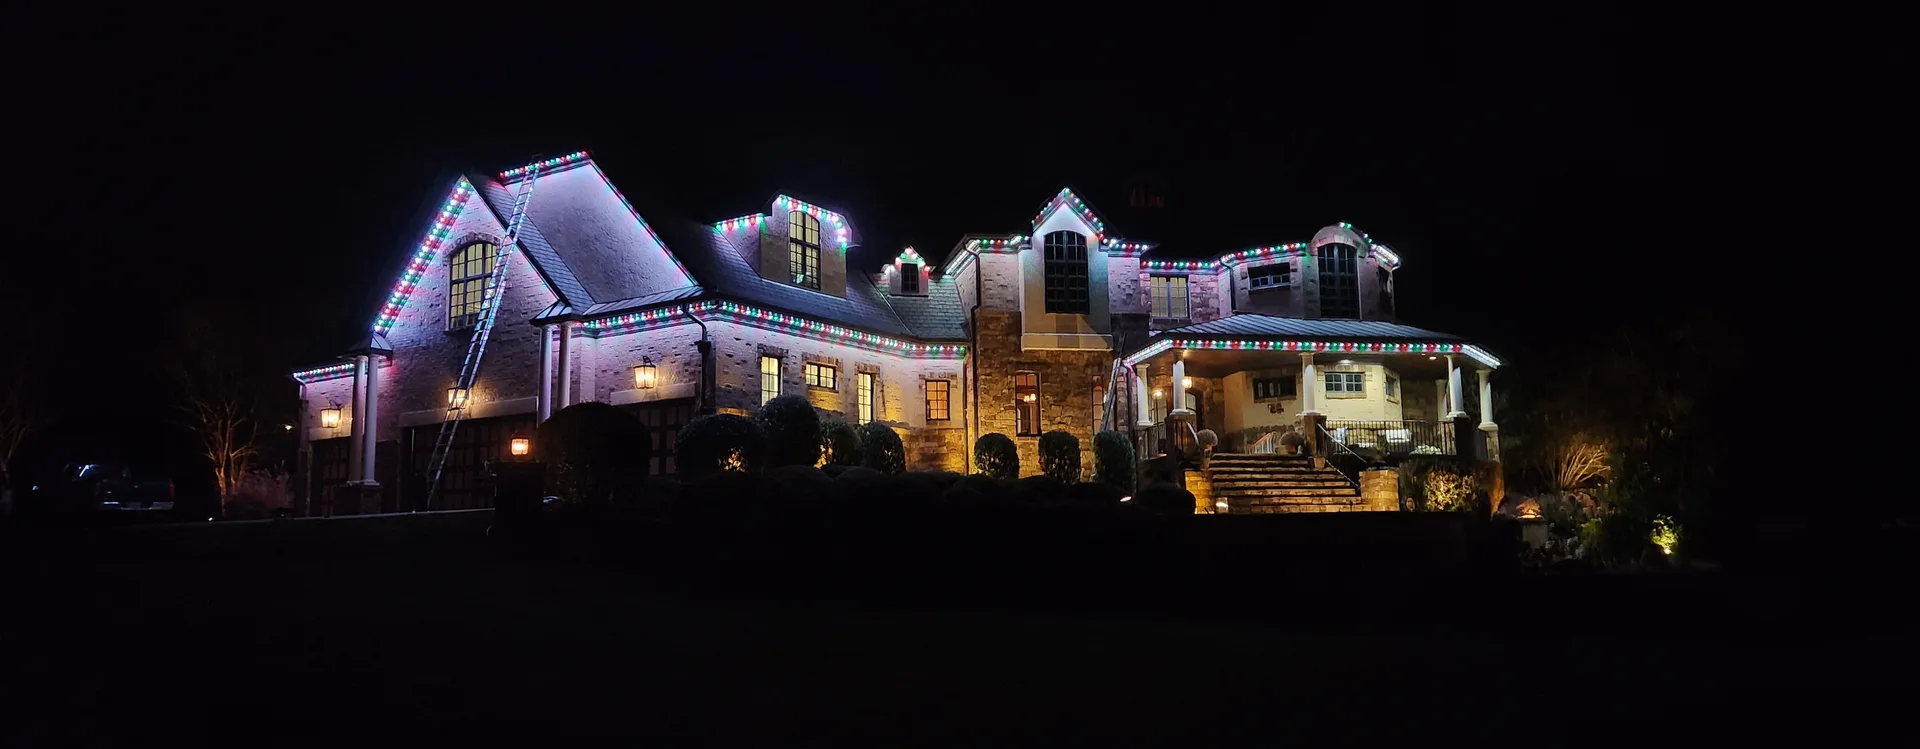
How Permanent Christmas Lights Are Wired: Power, Ground, and Data Explained
By Jolly Raleigh · September 17, 2026
TL;DR: Permanent roofline lights run on three wires: power, ground, and data. The data wire carries a stream of tiny instructions from a controller to every light. Some light strips add a fourth "backup" data wire so one dead light can't take out the rest. Get the ground and the voltage right, and everything else falls into place.
Permanent Christmas lights look like magic from the street. Millions of colors, patterns that chase along the roof, and it all happens from your phone. Under the track, though, it is a simple system. This post walks through how the wiring works, using a real strip we tested on our own bench.
If you would rather skip the wiring and just have it done, see our permanent RGB lighting page. If you like knowing how things work, keep reading.
The three wires every light needs
Almost every permanent lighting system uses "addressable" LEDs. Addressable means each light (or each small group of lights) has its own tiny chip. The chip listens for instructions and sets its own color. That is what lets one light be red while the next one is green.
To make that work, each strip needs three connections:
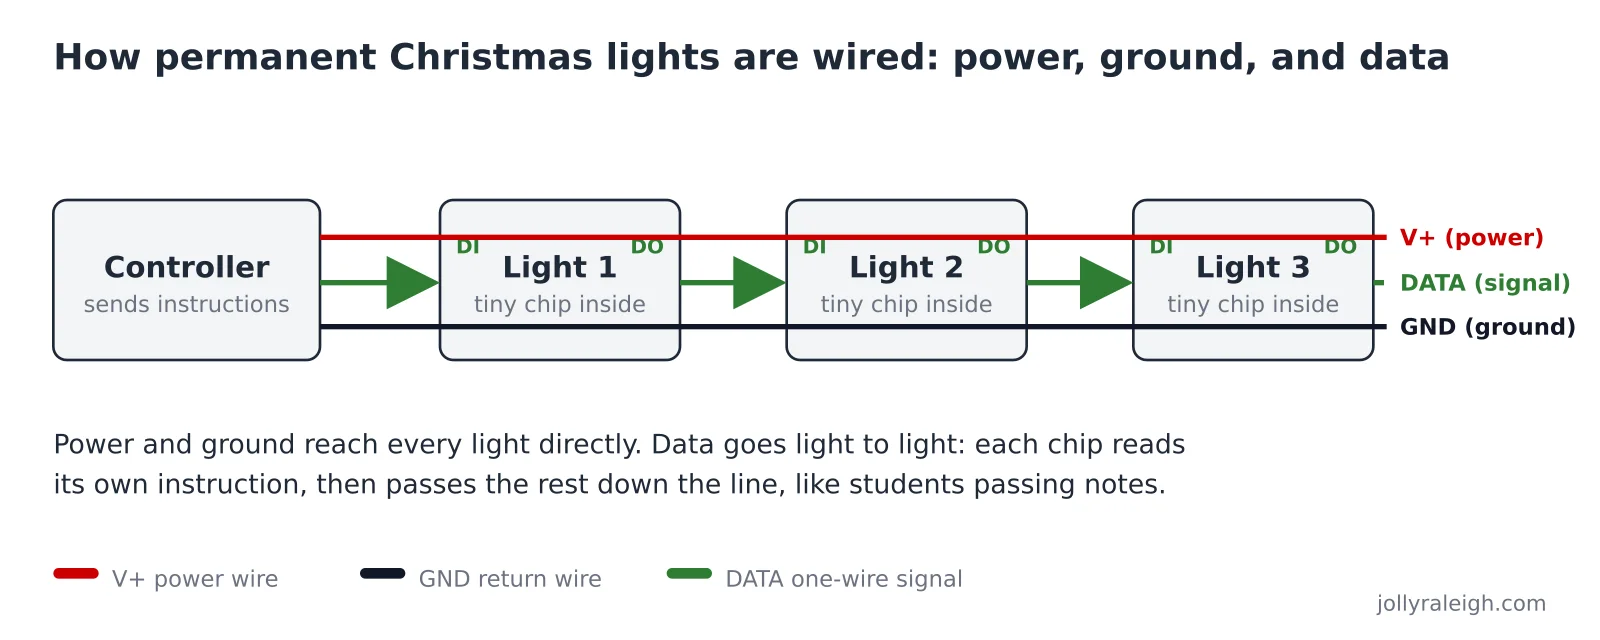
- Power (V+). This is the "plus" wire. It carries the voltage that runs the lights, usually 5, 12, or 24 volts.
- Ground (GND). This is the "minus" wire, the return path. Electricity leaves the power supply on V+, does its work in the lights, and comes home on ground.
- Data (DI/DO). This is the instruction wire. The controller sends a fast stream of ones and zeros down this wire. The first chip reads its instructions, then passes the rest down the line to the next chip.
Think of the data wire like a line of students passing notes. The first student reads the note meant for them and hands the rest of the stack down the row. The last student gets the last note. That is exactly how a chain of addressable lights works.
Why "3-pin in, 3-pin out, and a 4-pin out" is normal
Here is what confused us at first. We bought a new 12-volt strip to extend an existing run. It had a 3-pin plug on the input side. On the output side it had a 3-pin plug and a separate 4-pin plug. It looked like we needed some kind of adapter.
We did not. Here is what each plug is for:
- 3-pin input: Power, ground, and data in. This matches any standard addressable strip.
- 3-pin output: Power, ground, and data out. Use this to chain the next standard strip.
- 4-pin output: Power, ground, data out, and a backup data line. This only matters if the next strip also supports backup data.
That backup data line is a feature of chips like the WS2815 and GS8208. Each chip listens on two wires. If one light dies, the chip after it still gets the signal from the backup line, so the rest of the run keeps working. SuperLightingLED's comparison of the WS2815 and WS2812B calls this "breakpoint continuous transmission." Plain English: one bad light does not black out the roof.
If the next strip in your chain is a regular 3-pin strip, you plug into the 3-pin output and leave the 4-pin plug empty. Tape the open end so the bare pins can't touch anything.
Voltage: read the strip before you plug it in
Every strip has its voltage printed on it. The common ones are 5V, 12V, and 24V. This matters more than anything else in this post:
- A 12-volt supply will destroy a 5-volt strip.
- A 5-volt supply will make a 12-volt strip dim or dead.
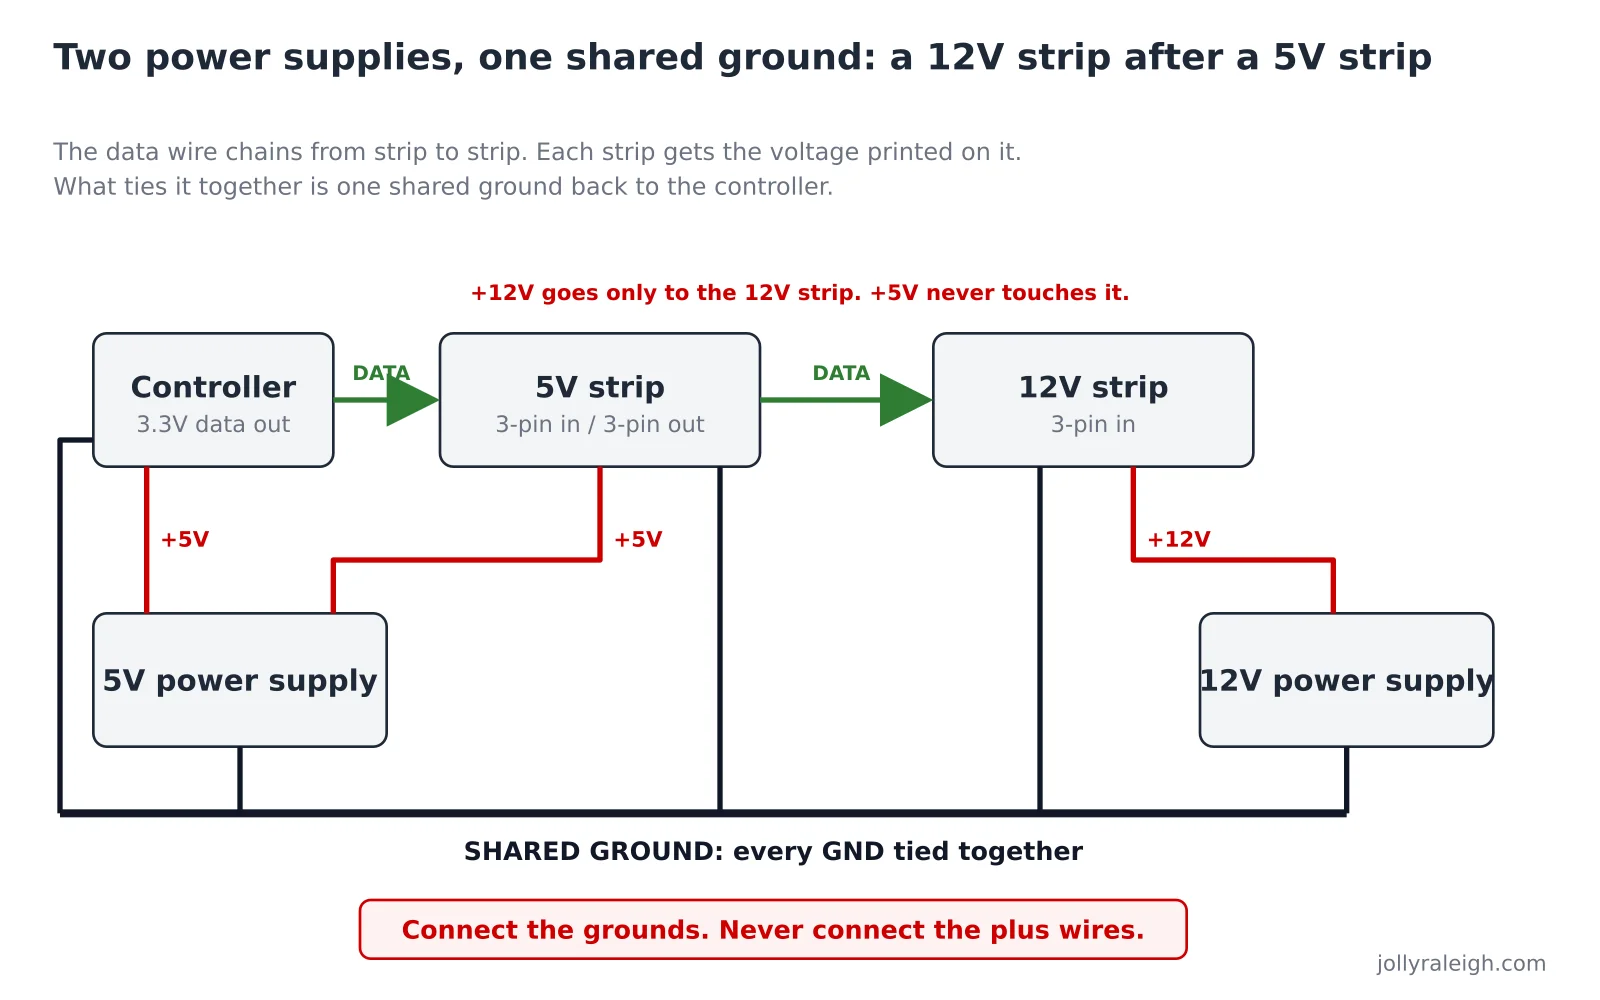
So if your controller and first strip run on 5 volts, and the new strip says 12 volts, the new strip needs its own 12-volt power supply. You still chain the data wire from strip to strip. You just feed each strip the voltage it wants.
Why do so many permanent systems use 12 volts or higher? Voltage "drops" as it travels down a long run of copper. At 5 volts, the far end of a long roofline gets dim and the colors shift toward red. Higher voltage pushes farther before that happens. We cover this in 5V vs 12V vs 24V: why roofline lights use higher voltage.
The one rule people forget: tie the grounds together
When you use two power supplies, connect both ground wires together. Only the grounds. Never the positive wires.
The data signal is measured against ground. If the controller's ground and the strip's ground are not connected, the strip has no reference point. It cannot tell a one from a zero. On our bench, the symptom was a strip that turned on but flickered a dim blue. It looked broken. It was just missing a ground wire.
When the ground is fine but it still flickers
After we tied the grounds, the strip still flickered. That pointed at the data signal itself.
Most small controllers send data at 3.3 volts. A 5-volt strip usually accepts that. A 12-volt strip is pickier. The chips inside expect a "high" signal of roughly 70 percent of their logic voltage, which works out to about 3.5 volts, according to this WS2812B interfacing guide. A 3.3-volt signal sits right at the edge. Sometimes it works. Sometimes it flickers.
Two ways to fix it:
- A level shifter. A tiny chip (the 74AHCT125 is the common one) that turns the 3.3-volt signal into a clean 5-volt signal. Professional controllers have this built in.
- Keep the data wire short. QuinLED's data-wire tests found that with a level shifter, a data run of 10 meters (32 feet) on thin wire was reliable. Without one, a 3.3-volt signal is only safe for a few inches.
We go deeper on this in what controls permanent lights: the microcontroller explained and in why LED lights flicker, glow dim blue, or show the wrong colors.
What a professional install looks like
A pro install uses the same three wires. The difference is in the details that keep it working for years:
- The controller and power supply live somewhere dry, like a garage, on a GFCI outlet.
- Runs are planned so voltage stays steady from the first light to the last, with extra power feeds ("power injection") on long rooflines.
- Every connection is sealed against rain, and the wire is rated for outdoor use.
- Data wires are kept short, or boosted, so the signal never gets flaky.
That is what you pay for when you hire it out. Our permanent RGB tracks come with a 5-year product warranty, and if a bulb or connection fails, we are the ones on the roof, not you. Get the details on our permanent RGB lighting page.
Frequently asked questions
Do permanent Christmas lights need an outlet?
Yes. The power supply plugs into a regular outdoor-rated outlet, usually a GFCI outlet in the garage or on a covered porch. Everything on the roof runs on low voltage DC from that supply.
Can I connect a 3-pin light strip to a 4-pin plug?
If the 4-pin plug is a backup-data output on an addressable strip, yes. Use the matching 3-pin output instead and leave the 4-pin plug empty. If the 4-pin plug is an analog RGB strip (one wire each for red, green, and blue), no. Those are different systems. See 2-pin vs 3-pin vs 4-pin LED lights.
Can I mix 5V and 12V strips?
You can chain the data wire between them. You cannot share a power supply. Each strip needs the voltage printed on it, and all the grounds must be connected together.
Why does my strip flicker a dim blue?
Almost always a missing ground connection between the controller and the strip. If the grounds are connected and it still flickers, the data signal is too weak. Add a level shifter or shorten the data wire.